Posts

Showing posts from September, 2016

Grafana's save/remove button does not appear on version 2.6

Image
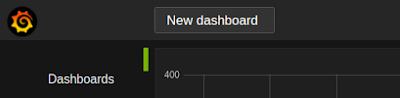
I'm using grafana 2.6 (from repositories), but I can't save or delete any dashboard. I try with chrome and firefox from linux but none work properly. To fix it, you need to install the last version (3.1.1) If you remove and purge grafana maybe you will get this error: sudo apt-get purge grafana Purging configuration files for grafana (2.6.0+dfsg-1) ... dpkg: warning: while removing grafana, directory '/var/log/grafana' not empty so not removed dpkg: warning: while removing grafana, directory '/var/lib/grafana' not empty so not removed To fix it, just remove them: sudo rm /var/log/grafana sudo rm /var/lib/grafana Now, proceed to install the last version: wget  https://grafanarel.s3.amazonaws.com/builds/grafana_3.1.1-1470047149_amd64.deb sudo dpkg -i grafana_3.1.1-1470047149_amd64.deb (Reading database ... 416705 files and directories currently installed.) Preparing to unpack grafana_3.1.1-1470047149_amd64.deb ... Unpacking grafana (

Ping plugin for Telegraf to ping multiple ips and export it to InfluxDB

Image
First, proceed to generate your telegraf configuration file with ping plugin enabled: telegraf -sample-config -input-filter ping -output-filter influxdb > telegraf_ping.conf If you want to do the classic ping with 1 sec interval, edit the following options: [agent]   interval = "1s"   flush_interval = "1s" [[inputs.ping]]   urls = ["8.8.8.8","8.8.4.4"]  #Add your ips list   count = 1   ping_interval = 1.0   timeout = 0.0 Now, to run it, execute: telegraf -config telegraf_ping.conf Meanwhile, you can show it on Grafana: Enjoy it!

How to add CPU load value to your InfluxDB with bash scripting

Image
First, we going to create a database with an example value, like this example: Now, with a bash script we going to write to our database the first value from /proc/loadavg, every 5s: while true; do curl -i -XPOST 'http://localhost:8086/write?db=stat' --data-binary "cpu,host=SERVER001 value=`cat /proc/loadavg | awk '{print $1}'`"; sleep 5;done

Plot a sine function with Python + InfluxDB + Grafana

Image
I found an updated code for InfluxDB v0.10.0 and I fork the proyect. The code is here: https://gist.github.com/dragonxtek/f7fb410a744fbccd836b25be454e7ba7 Just create a test database in InfluxDB and run sine.py

How to configure SNMP in mininet

First, you need to install snmp on your system: sudo apt-get install snmp snmpd Now, procced to configure snmp with the respective information about your machine: sudo mv /etc/snmp/snmpd.conf  /etc/snmp/snmpd.conf.org sudo vim /etc/snmp/snmpd.conf #Add these lines #Change public by your SecretPassword if you like rocommunity  public syslocation  "Somewhere" syscontact  nicolas.boettcher@mail.udp.cl Now, edit the snmp daemon to listen all interfaces: sudo vim /etc/default/snmpd Change from: # snmpd options (use syslog, close stdin/out/err). SNMPDOPTS='-Lsd -Lf /dev/null -u snmp -I -smux -p /var/run/snmpd.pid 127.0.0.1' To: # snmpd options (use syslog, close stdin/out/err). #SNMPDOPTS='-Lsd -Lf /dev/null -u snmp -I -smux -p /var/run/snmpd.pid 127.0.0.1' SNMPDOPTS='-Lsd -Lf /dev/null -u snmp -I -smux -p /var/run/snmpd.pid -c /etc/snmp/snmpd.conf' Now, restart the daemon with:  /etc/init.d/snmpd restart To check it's all o

TERM environment variable not set on Python

Image
To avoid this warning when you try clear your console through os.system('clear') on linux, you must configure TERM variable on your environment with "xterm-color" value. In Pycharm, you can add it on File/Settings.../Build, Execution, Deployment/ Console/Python Console Enjoy it!

How to execute Python scripts in Android

Image
First, you need to install QPython in your Android. To access to your Android console, you can use SSHDroid  (remote access) or Terminal Emulator  (local access). Python for Android depends from a lot bash scripts. You need use all of them to run it. Now, you need add to your PATH (configurable in init.environ.rc), python executable. Other option is create symbolic links of your apps to /system/bin, as follow: su mount -o rw,remount /system cd /system/bin ln -s /data/data/org.qpython.qpy/files/bin/end.sh  ln -s /data/data/org.qpython.qpy/files/bin/python-android5 ln -s /data/data/org.qpython.qpy/files/bin/init.sh ln -s /data/data/org.qpython.qpy/files/bin/qpython-android5.sh python Now you can run python on your console :) To execute a python script without calls to python, you must write on the first line of your script this line: #!/system/bin/python To execute the script, give it execution permission throught the console: chmod +x $NAME.py you can run the sc

How to enable Sphinx documentation in Pycharm

Image
Sphinx is a tool that makes it easy to create documentation. It was originally created for the new Python documentation, and enables to create it on html, LaTeX or linkcheck. See this blog for more information about Shpinx First, you need install Shpinx it on your system: pip install Sphinx Now, you need configurate the project folder from Pycharm on Tools/Sphinx Quickstart You should get this error: ReStructuredText Error  No sdk specified To solve it, use the same solution that in this previous post Now, you can compile your code to generate a html or a LaTeX file. Go to your project folder on your terminal and write: #if you want html make html #if you want LaTeX make latex If you want generate this from Pycharm, you need create an external tool. Go to  File/Settings.../Tools/External Tools/  and add the following configuration: Go to  Tools/External Tools/Generate HTML and you will see the following output:

external link opened a blank tab in chrome

This is a common problem, when you try login to your facebook account throught an external application, like Spotify Web Player for Linux As you know, create a password to use spotify stand alone (withut your facebook account) that they give you it's almost impossible. When you click to login with your facebook account, if you use chrome, it will open an empty new tab an it's impossible login in to your account. To fix it, just follow this command: rm $HOME/.local/share/applications/google-chrome.desktop Enjoy it!

Error: Cannot start process, the working directory does not exist

Image
I got this error on Pycharm Python Console. It's an error running console. To solve it, just remove .idea folder in your project and re run Pycharm. Enjoy it!

How to write a file code template in Pycharm

Image
To add utf-8 compatibility in all your scripts, one solution is enable a template that add this compatibility and other information as copyright, your name, etc. File and code templates are written in the Velocity Template Language (VTL). So you may include variables as ${YEAR}, ${USER}, etc. To add code to your scritps go to File/Settings.../Editor/File and Code Templates Select Python Script and add the following lines: #!/usr/bin/env python2 # -*- coding: utf-8 -*- # Copyright (C) ${YEAR} ${USER} Now, if you create a new Python file, it will generate with this header code by default. If you want more VTL variables please go  here Enjoy it!

How to configure Pycharm with github

Image
If you configured a previous project with your github account and now you try to work on it with Pycharm, yu will see this message when you'll start this IDE: Unregistered VCS root detected The directory ... is under Git, but is not registered in the Settings. Add root  Configure  Ignore Press Add root to add your folder to the git project configured on it. Go to the Version Control tab and start to add files to it with Add to VCS (or press Ctrl + Alt + A on the file) on the ChangeList catalogued as Unversioned Files.    When you are done, click on Commit Changes Now, write your Commit Message and push the Commit button and choose Commit and Push Write your github user and password and you are done. Enjoy it!

Interactive RYU controller with Postman

Image
A good way to communicate with your RYU controller is through Postman. You can find a lot of frequently curl requests on OF-DPA Ryu Rest, and you can import them to Postman. You can download them from ofdpa.com  (you need a previous registration) or download from this link Now, import them from Postman And now, enjoy it! You can use this video as tutorial

Synchronize your project with github

Image
To synchronize your project (folder) with git hub, first check connectivity with them. Create an ssh key with your github mail (the mail that you use to login) and copy it in your github account. Later check the connection. Follow these commands: apt-get install openssh-server ssh-keygen -t rsa -C "nicolas.boettcher@mail.udp.cl" cd ~/.ssh/ cat id_rsa.pub #Copy this key to your github config #Now, check connectivity to github ssh -vT git@github.com Now, create a new project on github page. To upload the content to github, follow these steps: cd $FOLDER git branch --set-upstream master origin/master git config --global user.name "$USER" git config --global user.email "$MAIL" git init #Now, add all files in your folder git add * git commit -m "$MESSAGE" git status git remote add origin https://github.com/$USER/$PROJECT_NAME git push origin master A common error is the following: ! [rejected]        master -> master (fetc

Enable Python interactive console in PyCharm

Image
Python has an interactive console that enable to explore your code after executing the script or the   command. If you run your code without interactive option you will see this message: Process finished with exit code 0 To activate it, go to Run/Edit Configurations ... remove all configurations (to the right of plus green icon) and write -i on interpreter options from Defaults/Python . Also, you can enable  Show command line afterwards checkbox, but your script may crash with this  following error, when try to read a string from the keyboard. Exception in thread ServerThread (most likely raised during interpreter shutdown): Process finished with exit code 1 Enjoy it!

Cannot find required executable controller

This is a typical problem when you try to run mininet topologies created with miniedit.py Cannot find required executable controller. Please make sure that it is installed and available in your $PATH: Many blogs said that the solution is rename ovs-controller to controller sudo ln /usr/bin/ovs-controller /usr/bin/controller , but ovs-controller does not exist anymore. This is, because ovs-controller has been renamed test-controller. To solve it, you need to create a symbolic link to ovs-testcontroller that is called controller. Install openvswitch-testcontroller if you don't have it. sudo apt-get install openvswitch-testcontroller sudo ln /usr/bin/ovs-testcontroller /usr/bin/controller

Install PyCharm Community Edition 2016.2.3 on Ubuntu with IPython/Jupyter Notebook compatibility

Image
PyCharm is another IDE for Python (in my last post I see how to install Spyder ) It has the advantage that you have multiples modes of view.  My favourite is the presentation Mode, perfect when you have a presentation and you need magnify the fonts and you need to show a on-demand code execution. Also, you can install jupyter to run ipython notebook inside the IDE.  To install PyCharm follow these commands: wget https://download-cf.jetbrains.com/python/pycharm-community-2016.2.3.tar.gz tar xvf pycharm-community-2016.2.3.tar.gz cd pycharm-community-2016.2.3/bin ./pycharm.sh Now, to install ipython and jupyter, follow these commands: sudo apt-get install ipython-notebook sudo pip install jupyter Run PyCharm and now create a new project. Now, create a new Jupyter Notebook with an ".ipynb" extension (IPYthon NoteBook): In the first cell puts: %matplotlib inline This sentence enable to display figures on the same interfa

How to install Spyder 3.0 developer version

Image
Spyder is a Scientific PYthon Development EnviRonment (IDE). To install it from github you need following these commands: git clone https://github.com/spyder-ide/spyder.git cd spyder python setup.py install spyder Failed to import qtpy. Please check Spyder istallation requirements: qtpy 1.1.0+ and either PyQt5 5.2+ or PyQt4 4.6+ If you get this error, you must install dependencies: sudo apt-get install python-pip pip install --upgrade pip sudo pip install qtpy qtawesome pickleshare pep8 qtconsole nbconvert python bootstrap.py Now, if you like a icon on your desktop to run Spyder just with one click, you need create spyder.desktop file on your Desktop with these lines: [Desktop Entry] Type=Application Icon=${SPYDER_FOLDER}/img_src/spyder.png Name=Spyder Comment="Start Spyder" Exec="/usr/local/bin/spyder" Terminal=false Categories=Controller; GenericName[en_US]= Name

Intel AES New Instructions (AESNI) libraries for C on Ubuntu

Image
First, you need to check if your CPU is compatible with hardware accelerated Intel technology for cipher/decrypt with AES. Next, we need to download the Intel AESNI library and compile it: wget https://software.intel.com/sites/default/files/article/181731/intel-aesni-sample-library-v1.2.zip unzip intel-aesni-sample-library-v1.2.zip cd Intel_AESNI_Sample_Library_v1.2 ./mk_lnx64_all.sh Maybe, you will get the following errror: collect2: error: ld returned 1 exit status Got error on link If you get it, please install yasm sudo apt-get install yasm Now, compile it again: ./mk_lnx64.sh      ~/Downloads/Intel_AESNI_Sample_Library_v1.2/aes_example ~/Downloads/Intel_AESNI_Sample_Library_v1.2/aes_example ~/Downloads/Intel_AESNI_Sample_Library_v1.2/intel_aes_lib ~/Downloads/Intel_AESNI_Sample_Library_v1.2/intel_aes_lib do iaesx64.s do do_rdtsc.s ~/Downloads/Intel_AESNI_Sample_Library_v1.2/intel_aes_lib ~/Downloads/Intel_AESNI_Sample_Library_v1.2/ae

UUID of the medium does not match the value stored in the media registry

If you try to load a VM to VBox and it name previously exists in the records with a different UUID, you will get this error. NS_ERROR_FAILURE(0x80004005) In VBox you will see a message that said your hard disk is inaccessible. To fix it, you need replace the new UUID in the configuration (.vbox file) of your VM. Copy from ~/.config/VirtualBox/VirtualBox.xml the respective UUID from your virtual disk (see MachineEntry uuid). After, replace the UUID in your .vbox configuration file inside your VM folder. Enjoy it!

Increment your VM storage size in VBox

Image
The reason of this tutorial is because I was playing with a Virtual Machine and I overfill the hardisk space. To resize the storage, first you need de-attach the hardisk from your VM and close VBOX. Later, you need convert your .vmdk to a .vdi file with the following command: vboxmanage clonehd ./machine.vmdk clone.vdi --format vdi  VBoxManage: error: Cannot register the hard disk 'machine.vmdk' {4e55fd9e-f496-4cbf-9610-ad2f8c6b8634} because a hard disk 'machine.vmdk' with UUID {4e55fd9e-f496-4cbf-9610-ad2f8c6b8634} already exists VBoxManage: error: Details: code NS_ERROR_INVALID_ARG (0x80070057), component VirtualBoxWrap, interface IVirtualBox, callee nsISupports VBoxManage: error: Context: "OpenMedium(Bstr(pszFilenameOrUuid).raw(), enmDevType, enmAccessMode, fForceNewUuidOnOpen, pMedium.asOutParam())" at line 178 of file VBoxManageDisk.cpp If you get this error, you must change the UUID from your VM with the following command: vboxmanage internal

Could not get the storage format of the medium .iso (VERR_NOT_SUPPORTED).

Image
This is a typical problem in VBox when you try to load a corrupted iso file. Check if your iso has the same original iso hash with the following commad: md5sum file.iso In my case, I could check the hash in gparted download section, and effectively was different.

Topology Generator for ns3 on Ubuntu 16.04

Image
While I find a solution to execute different BRITE configuration files or how to export ns2 topologies to ns3, I found this application compatible with ns-3.25 (since last week available). To try it, follow these commands: git clone https://github.com/idaholab/Topology_Generator.git cd Topology_Generator  qmake make ./ns-3-generator You can generate a C++ or a Python code and export your topology as XML code. Also, you can create applications, like ping, UDP Echo or TCP Transfer. I tested and it works! Enjoy it!

Creating topologies with BRITE to NS (Network Simulator)

Image
BRITE (Boston University Representative Internet Topology Generator) is a tool to create topologies using Barabasi Albert or Waxman model. You can export the topologies to different formats like BRITE, Otter, SSF, JSim and NS. You can use the configuration files available on BRITE repositorie for nsnam, but are only a few of them. You can run the different configurations modifing the confFile variable inside the file or with the following command: ./waf --run 'brite-generic-example --confFile=src/brite/examples/conf_files/TD_ASBarabasi_RTWaxman.conf' If you try other configuration file you will get this following error: (gdb)  Program received signal SIGSEGV, Segmentation fault. 0x0000000000410faf in ns3::PeekPointer<ns3::Node> (p=...) at ./ns3/ptr.h:564 564  return p.m_ptr; (gdb) where #0  0x0000000000410faf in ns3::PeekPointer<ns3::Node> (p=...) at ./ns3/ptr.h:564 #1  0x00000000004105e4 in ns3::Ptr<ns3::Node>::Ptr (this=0x7fffffffcfa0, o=.

How to install MarketPlace Client on Eclipse CDT

Image
If you download the Eclipse CDT version from the eclipse webpage, this version doesn't come with marketplace client by default. Eclipse CDT uses eclipse 3.8 (Indigo version). To install it, you need to do the following steps: Go to Help->Install New Software... Point to Eclipse Indigo Site, If not available add the site "Indigo - http://download.eclipse.org/releases/indigo" Work with the above site Look at "General Purpose Tools"->Marketplace Client After install it, restart Eclipse and you could find Marketplace in Help->Eclipse Marketplace... Now, you can install each plugin through marketplace. Enjoy it!

Resource name without extension to use as variable in external tools on Eclipse

Image
In my last post about how to configure ns3 on Eclipse  I gave the file name through a string prompt variable ("${string_prompt}"). This method is bored, for this reason I searched, how to give the file name without the extension automatically. StartExplorer is a plugin for Eclipse and in their web, they mentioned the following: In addition, StartExplorer itself offers a few variables of its own. ${resource_name_without_extension} : File name or directory name of the resource, without path and without extension (that is, resource, without trailing dot) Also, the plugin Pathtool is another plugin with several variables. I  installed them using the MarketPlace client (see how to install marketplace on Eclipse CDT ), but the variable that I want didn't appear in the variable list. To automate the execution of my simulations, I created a bash script that calls waf (called wafEclipse) and parse the file name to remove the extension .cc This is the wafEclipse co