Posts

Showing posts from August, 2016

Install and configure Eclipse IDE to use with ns3 on Ubuntu

Image
First, you need to download Eclipse CDT (C/C++ Development Tooling): sudo apt-get install eclipse-cdt eclipse-mercurialeclipse Maybe, you will have problems to run eclispse and it will close: An extract of the log: org.osgi.framework.BundleException: The bundle "org.eclipse.equinox.simpleconfigurator_1.0.301.dist [1]" could not be resolved. Reason: Missing Constraint: Bundle-RequiredExecutionEnvironment: CDC-1.1/Foundation-1.1,J2SE-1.4 !MESSAGE Bundle initial@reference:file:plugins/org.eclipse.equinox.simpleconfigurator_1.0.301.dist.jar was not resolved. !MESSAGE Missing required capability Require-Capability: osgi.ee; filter="(|(&(osgi.ee=CDC/Foundation)(version=1.1))(&(osgi.ee=JavaSE)(version=1.4)))" To solve it, you must change your java version to other compatible with eclipse. In my case, I was using openjdk9, and I switch it for openjdk8-jre. sudo apt-get install openjdk-8-jre sudo update-alternatives --config java

Install ns3-dev through bake on Ubuntu

Bake is an open source integration tool implemented in Python and it is used to automate the build of a number of projects which depend on each other. First, install ns3 dependencies: sudo apt-get install gcc g++ python python-dev mercurial gdb valgrind gsl-bin libgsl0-dev flex bison tcpdump sqlite sqlite3 libsqlite3-dev libxml2 libxml2-dev libgtk2.0-0 libgtk2.0-dev vtun lxc uncrustify doxygen graphviz imagemagick texlive texlive-latex-extra texlive-generic-extra texlive-generic-recommended python-pygraphviz python-kiwi python-pygoocanvas libgoocanvas-dev Now, download bake and check the dependencies: mkdir ns3 cd ns3 hg clone http://code.nsnam.org/bake cd bake python bake.py check  > Python - OK  > GNU C++ compiler - OK  > Mercurial - OK  > CVS - is missing  > GIT - OK  > Bazaar - is missing  > Tar tool - OK  > Unzip tool - OK  > Unrar tool - is missing  > 7z  data compression utility - is missing  > XZ data compression utility

Enable Remote Desktop Server on Ubuntu

Image
To control another pc with GUI, you must enable share your desktop. In Desktop Sharing preferences, enable Allow other users to view your Desktop. Optionally, you can add an additional password (to prevent anyone access to your computer). Now, run Remmina on your client terminal and add a new profile with VNC - Virtual Network Computing Protocol. Don't forget configure the ip, user and password of your server.

GDB and breakpoints in ns3

Image
If you want debug your simulation, a good option is use gdb. If you want create breakpoints (watchpoints) in your file, just add this line: ns3::BreakpointFallback();  Also, you can do it by the classic way with these lines: #include <signal.h> raise(SIGINT); Now, just execute: ./waf --command-template="gdb %s" --run $FILE_NAME run Whre $FILE_NAME is your simulation file, frequently located at scratch folder. As you can see with "where", the breakpoint was in line 101. You will get these follows signals: Program received signal SIGTRAP, Trace/breakpoint trap. 0x00007fffeaba02a9 in raise (sig=5) at ../sysdeps/unix/sysv/linux/pt-raise.c:35 35 ../sysdeps/unix/sysv/linux/pt-raise.c: No such file or directory. Program received signal SIGINT, Interrupt. 0x00007fffeaba02a9 in raise (sig=2) at ../sysdeps/unix/sysv/linux/pt-raise.c:35 35 ../sysdeps/unix/sysv/linux/pt-raise.c: No such file or directory.

A NetAnim example for ns3

Image
NetAnim is a GUI for ns3 (like visualizer). The last version 3.107 comes with ns3-allinone-3.25. To compile it follow these commands: #Install required software sudo apt-get install mercurial qt4-dev-tools #Download netanim from mercurial hg clone http://code.nsnam.org/netanim #or use it from ns3-allinone-3.25 cd netanim-3.107 make clean qmake NetAnim.pro  (For MAC Users: qmake -spec macx-g++ NetAnim.pro) make  ./NetAnim To generate an xml file compatible with netanim, you must add the following lines to your simulation file. // netanim headers   #include "ns3/netanim-module.h" // file's name to run on netanim   std::string animFile = "example.xml" ;    AnimationInterface anim (animFile); // background image. Starts on 0,0, the image is not resized (scale 1,1) and the image has no transparency (alpha channel is one).   anim.SetBackgroundImage("potential_google_fiber_cities.png",0,0,1,1,1); // Set position of node 0 in the

How to install openflow 1.3 in ns3

NS3 by default use openflow version 0.8.9, it's very outdated. To install this module, first we'll check the modules compatibility with our Ubuntu 16.04: sudo apt-get install gcc g++ python python-dev sudo apt-get install mercurial bzr gdb valgrind gsl-bin libgsl0-dev libgsl0ldbl flex bison gcc g++ tcpdump sqlite sqlite3 libsqlite3-dev libxml2 libxml2-dev libgtk2.0-0 libgtk2.0-dev vtun lxc uncrustify doxygen graphviz imagemagick texlive texlive-latex-extra texlive-generic-extra texlive-generic-recommended python-pygraphviz python-kiwi python-pygoocanvas libgoocanvas-dev hg clone http://code.nsnam.org/ns-3-allinone cd ns-3-allinone && ./download.py cd ns-3-dev ./waf configure --enable-examples --enable-tests  BRITE Integration             : not enabled (BRITE not enabled (see option --with-brite)) MPI Support                   : not enabled (option --enable-mpi not selected) NS-3 Click Integration        : not enabled (nsclick not enabled (see option --with-

Titanium Backup Pro Backup and Recovery issues

Image
If you want to backup your files and data as batch actions, maybe you will see this error: Backup failed: Insufficient free storage space This error can appears even if you have free space. This happens because of permissions to app-created folders being restricted in newer Android versions. To avoid it, you need untick 'Mount namespace separation' setting in SuperSU,  reboot and try your Titanium Backup operation again. Now, you could backup your files. If you want copy your backed apps to your pc, a common error is don't view any file inside your /sdcard/TitaniumBackup/ folder in your pc (you can see them in your smartphone). To avoid it, restart you smartphone after the backup operation. Other options (I have not tested yet, is use adb pull /sdcard/TitaniumBackup/ or copy the files to another folder, like Downloads). Other commor issue is when you try restore your backed apps. The restoring process freezes. To fix it, download the l

Improve your terminal with suggestions from your history with zsh

Image
If you want enable command prediction on your terminal, a good option is to install zsh. sudo apt-get install zsh  Now, replace bash by zsh with the following instruction: USER=`whoami` chsh -s /bin/zsh $USER Now, install Oh My Zsh: sh -c "$(curl -fsSL https://raw.github.com/robbyrussell/oh-my-zsh/master/tools/install.sh)" And finally install Fish-like autosuggestions for zsh: git clone http://github.com/zsh-users/zsh-autosuggestions $ZSH_CUSTOM/plugins/zsh-autosuggestions Edit your ~/.zshrc file and add zsh-autosuggestions as a plugin: plugins=(git zsh-autosuggestions) If you like, you can change your terminal theme. I like cobalt2: git clone https://github.com/powerline/fonts.git cd fonts ./install.sh cd .. git clone https://github.com/wesbos/Cobalt2-iterm.git cd Cobalt2-iterm  mv cobalt2.zsh-theme ~/.oh-my-zsh/themes  vim ~/.zshrc  ZSH_THEME="cobalt2" Now, we can restart zshell with the following comm

Install freeplane on Ubuntu 16.04

Image
Let's go! wget http://ufpr.dl.sourceforge.net/project/freeplane/freeplane%20stable/freeplane_bin-1.5.13.zip unzip freeplane_bin-1.5.13.zip cd freeplane-1.5.13 ./freeplane.sh  Exception in thread "main" java.lang.reflect.InaccessibleObjectException: Unable to make member of class sun.awt.X11.XToolkit accessible:  module java.desktop does not export sun.awt.X11 to unnamed module @27d415d9 at jdk.internal.reflect.Reflection.throwInaccessibleObjectException(java.base@9-ea/Reflection.java:414) at java.lang.reflect.AccessibleObject.checkCanSetAccessible(java.base@9-ea/AccessibleObject.java:174) at java.lang.reflect.Field.checkCanSetAccessible(java.base@9-ea/Field.java:170) at java.lang.reflect.Field.setAccessible(java.base@9-ea/Field.java:164) at org.freeplane.launcher.Launcher.fixX11AppName(Launcher.java:55) at org.freeplane.launcher.Launcher.main(Launcher.java:65) In my last post, I explain how to install oracle java 9 , but in this case, we need a previ

Install oracle java on Ubuntu 16.04

To avoid this error: ERROR:   Couldn't find a java virtual machine,          define JAVACMD, JAVA_BINDIR, JAVA_HOME or PATH. You can add oracle java to your repositories: sudo add-apt-repository ppa:webupd8team/java  sudo apt-get update sudo apt-get install oracle-java9-installer -y

Install last version stable from google chrome on Ubuntu 16.04

wget -q -O - https://dl-ssl.google.com/linux/linux_signing_key.pub | sudo apt-key add -  sudo sh -c 'echo "deb [arch=amd64] http://dl.google.com/linux/chrome/deb/ stable main" >> /etc/apt/sources.list.d/google.list' sudo apt-get update sudo apt-get install google-chrome-stable

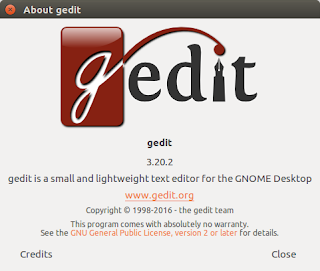
Install the lastest gedit (version 3.20.2) on Ubuntu 16.04

Image
Lets go! wget http://ftp.gnome.org/pub/GNOME/sources/gedit/3.20/gedit-3.20.2.tar.xz  tar xvf gedit-3.20.2.tar.xz cd gedit-3.20.2 ./configure configure: WARNING:   You will not be able to create source packages with 'make dist'   because gtk-doc >= 1.0 is not found. ./configure: line 13872: intltool-update: command not found checking for intltool >= 0.50.1...  found configure: error: Your intltool is too old.  You need intltool 0.50.1 or later. checking for GSPELL... no configure: error: gspell library not found or too old. Use --disable-spell to build without spell plugin. To fix the first tow errors you need to install the following files: sudo apt-get install gtk-doc-tools intltool Now, we download gspell: sudo apt install git git clone https://github.com/GNOME/gspell.git cd gspell/ ./autogen.sh configure.ac:142: error: macro GOBJECT_INTROSPECTION_CHECK is not defined; is a m4 file missing? /usr/share/aclocal/ax_require_defined.m4:35: AX_REQ

Autocompletion doesn't work while logged as root

When you try autocomplete commands logged as super user with "sudo su" (to install software with apt-get for example), by default this option is unavailable. To enable the autocomplete for root user you need uncomment the last 3 lines in your /root/bash.bashrc file or add them if not exist. if [ -f /etc/bash_completion ]; then   . /etc/bash_completion fi Now, restart your bash: $ bash -- Enjoy it!

Sorry, your browser/program is not supported by Web Dynpro!

Image
com.sap.tc.useragent.UnsupportedUserAgentException: User Agent (Chrome, 52.0, unknown) is not supported! com.sap.tc.useragent.service.UserAgentServiceImpl If you try to connect to a web page with this error (ussualy a SAP web server) maybe you are under Linux or you are not an IE fan. SAP use a list (like white list) with valid user agents and it's not always updated. To solve it, install User-Agent Switcher for Chrome (if you are uing Chrome) and change your user agent to Windows Firefox 33. Enjoy it!

Fix "Set scan parameters failed: Input/output error" on Ubuntu 16.04

This error appears when you try scan bluetooth low energy devices with hcitool lescan. The major blogs give similars solutions like: hciconfig hci0 down hciconfig hci0 up or service bluetooth restart or sudo hciconfig hci0 reset but none gave me a solution... The last bluez version (at this moment) available for Ubuntu 16.04 is version 5.37. To solve this problem you must install the last version available from the bluez web page (version 5.41). wget https://www.kernel.org/pub/linux/bluetooth/bluez-5.41.tar.xz tar xvf bluez-5.41.tar.xz sudo apt-get install libudev-dev libical-dev libreadline6-dev libdbus-1-dev libglib2.0-dev ./configure make sudo make install sudo hcitool lescan       LE Scan ... Enjoy it!

Use a remote wireshark interface to sniff your smartphone traffic with tcpdump and ssh

If you want sniff your data throught your mobile device, a good option is redirect it to your pc and view it using wireshark (you can see your traffic in real time). To do this, you need download previosly a tcpdump compiled for ARM or to our arquitecture. Now these are the following steps to mount your device on the pc: adb root adb remount remount of system failed: Permission denied remount failed This is a common error. To solve it, you need run the instructions as super user: adb shell su -c mount -o rw,remount /system adb push tcpdumpt /system/xbin/ Now we need to give execution permission to tcpdump: adb shell su -c chmod 777 /system/xbin/tcpdump In Android, you can download SSHDroid to install a ssh server with port 2222 as default. Later we transfer the output to wireshark: ssh root@${ip} -p 2222 tcpdump -U -s0 -w - 'not port 2222' | wireshark -k -i - tcpdump: Can't open netlink socket 13:Permission denied Remember, give permission with su