Posts

Showing posts from 2016

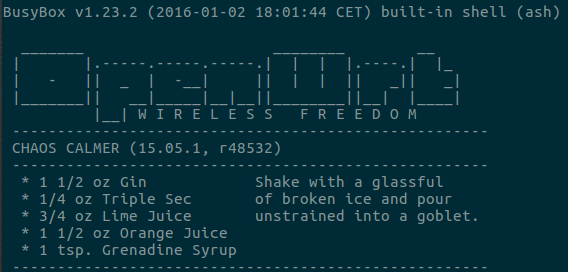
How to install Netem on a TP-Link TL-WR1043ND router with OpenWRT
Image
To use Netem we need to install traffic control (tc). To do this, we need install the last OpenWRT version (Chaos Chalmer). I tested before on Attitude Adjustment (a previous version) and I couldn't install on it. To install the last version go to this page  and choice your branch (stable or trunk). After install the factory and upgrade binary, run the following commands on your router console (throught ssh): opkg update opkg install tc iptables-mod-ipopt kmod-sched kmod-netem A typical netem example is: tc qdisc change dev eth0 root netem delay 10ms RTNETLINK answers: No such file or directory Remember, load netem first: insmod sch_netem If you have the same problem, run netem with this format: tc qdisc add dev eth0 root handle 1:1 netem delay 10ms Enjoy it!

from: can't read /var/mail/ in Python scripts

If you add a Python file to your PATH, maybe you will see this error: from: can't read /var/mail/$First_Library_Name This happend, because you need to be explicit with application you want to run your script. To fix it, just add in the first line of your script the following line: #! /usr/bin/python Enjoy it!

How to configure Gmail as your default mail client in Ubuntu

Image
It is very easy! Install gnome-gmail and after set it as your default mail client. sudo apt-get install gnome-gmail Enjoy it!

Exception: Could not find a default OpenFlow controller in Mininet

If you try to run a mininet script like this  , maybe you will get this problem if you are under Ubuntu. Exception: Could not find a default OpenFlow controller  This is trigger because your system don't find a default controller . To enable it just add the first line and add the controller argument to net variable like the second line: from mininet.node import OVSController net = Mininet(topo=topo,host=CPULimitedHost, link=TCLink,controller = OVSController) Now, you will get the following error: c0 Cannot find required executable ovs-controller. Please make sure that it is installed and available in your $PATH: (/usr/local/sbin:/usr/local/bin:/usr/sbin:/usr/bin:/sbin:/bin:/snap/bin) ovs-controller is a legacy name. You need to be sure that you has it. sudo apt-get install openvswitch-testcontroller sudo cp /usr/bin/ovs-testcontroller /usr/bin/ovs-controller If you run it again, you should kill ovs-testcontroller first to avoid this: Exception: Please s...

¿CĆ³mo escribir tildes en QT4 Designer?

Image
Uno de los problemas al tratar de desarrollar una aplicaciĆ³n en espaƱol, es que QT4 Designer no permite escribir con tildes. Para solucionar este problema de mala ortografĆ­a, se debe desactivar los xmodifiers desde el terminal y luego ejecutar la aplicaciĆ³n: #!/bin/bash unset XMODIFIERS designer-qt4 & Problema resuelto!

How to run a Matlab function as a standalone executable

If you have a function, you can compile and run it without Matlab. To do that, just write a .m file like test_cpu.m  and leave it as follows: function [time]= test_cpu(n) if isdeployed      n=str2double(n); end A = rand(n,n); tic; fft(A); time = toc; disp(time); It's important check is the file is deployed (compiled) to convert the argument to double for avoid this error: Error using rand CLASSNAME input must be a class that supports RAND, for example, 'single' or 'double'. Error in test_cpu (line 2) MATLAB:rand:invalidOutputType Now, compile the file with the following command in your matlab cli: mcc -m test_cpu.m -o test_cpu To run the executable, you will get these errors: ./test_cpu: error while loading shared libraries: libmwlaunchermain.so: cannot open shared object file: No such file or directory ./test_cpu: error while loading shared libraries: libmwmclmcrrt.so.9.0.1: cannot open shared object file: No such file or directory ...

How to use GPU in Matlab scripts

Image
If you have an Nvidia Graphic Card, you must install nvidia drivers to get the best performance. To save an array to your GPU memory, just save it with gpuArray and to return it to your Ram use gather . A simple CPU example is the following: function [time]= cpu(n) A = rand(n,n); tic; B = fft(A); time = toc; If we want use the GPU, just add the bold lines: function [time]= gpu(n) A = rand(n,n); % send A to the GPU A = gpuArray(A); tic; B = fft(A); time = toc % return  B to the CPU B = gather(B) To know how many bytes will need your CPU to storage a gpuArray, before gather it, you can use this equation: numel(B) * 8 for double-precision arrays  or numel(B) * 16 if the array is complex To checkout the variable size, use the command: whos If you choise a large value for n, probably you will see the following message: Out of memory on device. To view more detail about available memory on the GPU, use 'gpuDevice()'. If the problem persists, reset...

How to fix "Please enable Flash to use the Spotify web player" on Ubuntu 16.04

Image
This error appears when you try load spotify web player and it doesn't load. If you have this problem, the generic solution is to clear cookies and data from your browser. but it doesn't work... The solution is to install ubuntu-restricted-extras sudo apt-get install ubuntu-restricted-extras Enjoy it!

How to install sublime on Ubuntu 16.04

To install this excellent editor, just add it to your repository: sudo add-apt-repository ppa:webupd8team/sublime-text-3 sudo apt-get update sudo apt-get install sublime-text-installer If you like, you can pay for the license or use this . —– BEGIN LICENSE —– MinBan Single User License EA7E-806395 318133A3 8F202A61 B0DBB8EB 21E17D2E 97D540E6 34079344 54620650 71E47589 9EF87857 345F5042 0D728DD1 8D8C979D 6A4F4DD2 67BB0345 746CA297 515BDA91 6CEAB381 4DB56700 D77DCD14 977BD326 1AC309ED 0EB414B8 4730DA10 99DBD291 FC88E0EF DCC7E3A9 56E4FFED 7629746B E529AECA 92A96B60 72AE8928 8A240AAC —— END LICENSE ——

How to install nvidia drivers on Ubuntu 16.04

Image
To check how many frames per second reach your graphic card, you can run glxgears : sudo apt-get install mesa-utils glxgears 2854 frames in 5.0 seconds = 570.636 FPS 2800 frames in 5.0 seconds = 559.996 FPS 2828 frames in 5.0 seconds = 565.470 FPS 2875 frames in 5.0 seconds = 574.286 FPS 2903 frames in 5.0 seconds = 579.824 FPS To show wich driver is using it, put the following sentence on your terminal: glxinfo | grep OpenGL OpenGL vendor string: VMware, Inc. OpenGL renderer string: Gallium 0.4 on llvmpipe (LLVM 3.8, 256 bits) OpenGL core profile version string: 3.3 (Core Profile) Mesa 11.2.0 OpenGL core profile shading language version string: 3.30 OpenGL core profile context flags: (none) OpenGL core profile profile mask: core profile OpenGL core profile extensions: OpenGL version string: 3.0 Mesa 11.2.0 OpenGL shading language version string: 1.30 OpenGL context flags: (none) OpenGL extensions: OpenGL ES profile version string: OpenGL ES 3.0 Mesa 11.2....

How to install Chrome on Ubuntu 16.04 with apt-get

Simply, just put these lines on your terminal: wget -q -O - https://dl-ssl.google.com/linux/linux_signing_key.pub | sudo apt-key add -  sudo sh -c 'echo "deb https://dl.google.com/linux/chrome/deb/ stable main" >> /etc/apt/sources.list.d/google.list' sudo apt-get update sudo apt-get install google-chrome-stable If you are using a 64 bits architecture, you will get this error: N: Skipping acquire of configured file 'main/binary-i386/Packages' as repository 'http://dl.google.com/linux/chrome/deb stable InRelease' doesn't support architecture 'i386' Just edit /etc/apt/sources.list.d/google.list and add "[arch=amd64]" before: deb http://dl.google.com/linux/chrome/deb/ stable main afet: deb [arch=amd64] http://dl.google.com/linux/chrome/deb/ stable main Now, retry sudo apt-get update sudo apt-get install google-chrome-stable Enjoy it!

How to rotate an external HDMI monitor on Ubuntu 16.04

Image
If you have an external monitor like a DELL 24" IPS P2414H, one problem is that it doesn't recognize when it rotates. I developed on bash an application to rotate the monitor. You need identificate the name and resolution of your monitor. Just run: xrandr | grep " connected" | grep -v primary HDMI1 connected 1920x1080+1366+0 (normal left inverted right x axis y axis) 527mm x 297mm As you see, my second monitor is identified as HDMI1 with 1920x1080 pixels as resolution. This is the script: #!/bin/bash left=`xrandr | grep HDMI1 | grep -o left | wc | awk '{print $1}'` if [ $left -eq 2 ]  then     xrandr --output HDMI1 --mode 1920x1080 --rotate normal else     xrandr --output HDMI1 --mode 1920x1080 --rotate left fi I filtered by left, because when I rotate my monitor always is to left. You can change it to any other direction. You can create a .desktop and use any of these images.   Enjoy it!

How to access a ssh account through ssh multihop

If you have a machineA without open ports to Internet, but you can access to it on your local network, a solution is access throught a DMZ machineB with ssh. Just use this command: ssh -t userB@machineB ssh userA@machineA Also, you can create an alias on your ~/.bashrc file: alias ssh_machineA='ssh -t userB@machineB ssh userA@machineA'  Other option, is to do it throught ProxyCommand. Add to your ~/.ssh/config file these lines: # machineA config file Host machineA Hostname machineA.com port 22 User lala # machineB config file Host machineB Hostname machineB.com port 22 user lala ProxyCommand ssh -q machineA nc -q0 machineB 22 If you run ssh, you probably you will get this message: ssh machineB nc: getaddrinfo: Name or service not known ssh_exchange_identification: Connection closed by remote host To fix it, change the last line by: ProxyCommand ssh -W %h:%p machineB Enjoy it!

How to install Matlab without GUI

If you want to install Matlab in a server, probably you don't have a GUI. To run the installer you need previosly configurate silent mode: ./install -mode silent Preparing installation files ... Installing ... (Nov 03, 2016 10:53:02) ################################################################## (Nov 03, 2016 10:53:02) (Nov 03, 2016 10:53:03) When running the installer with an input file, you must accept the license agreement by setting the agreeToLicense option to yes. (Nov 03, 2016 10:53:03) Exiting with status -2 (Nov 03, 2016 10:53:07) End - Unsuccessful. The previous error is because we need configurate all options, like if you are agree with the license agreement, enter the licence key, etc. To do this, you need to edit  installer_input.txt and  activate.ini files: In activate.ini these are the lines that you need configurate: isSilent=true activateCommand=activateOffline licenseFile=/root/Matlab_R2016a_glnxa64.lic In installer_input.txt these ...

How to comment multiple lines in Pycharm

Image
If you have a latin keyboard without numpad or any without slash key, maybe you couldn't use the shortcut enabled in Pycharm to comment multiple lines (Ctrl+Slash). To change this shortcut, you must create a default keymap copy to edit it, just clicking on Copy button. Go to File/Settings... and write keymap Now, filter by comment and add a new keystroke, like Shift+3 Enjoy it!

How to install pyqtgraph in Ubuntu 16.04

If you need any python module, the best alternative to install it is thrught pip: sudo pip install pyqtgraph but, I don't know why, if you try import pyqtgraph it doesn't recognize: python                   Python 2.7.12 (default, Jul  1 2016, 15:12:24)  [GCC 5.4.0 20160609] on linux2 Type "help", "copyright", "credits" or "license" for more information. >>> import pyqtgraph as pg Traceback (most recent call last):   File "<stdin>", line 1, in <module> ImportError: No module named pyqtgraph Don't remember that always you can use apt-get for the same: sudo apt-get install python-pyqtgraph Now, you can see all examples with the following command: python -m pyqtgraph.examples Enjoy it!

Debug SDN Ryu controller with Pycharm

Image
If you want debug your Ryu App, you need execute ryu-manager throught Pycharm. To do it, you need execute the following python script in the same folder where you have the ryu app. I got the script from  https://www.mail-archive.com/ryu-devel%40lists.sourceforge.net/msg08519.html #!/usr/bin/env python # -*- coding: utf-8 -*- import sys from ryu.cmd import manager def main(): sys.argv.append('--ofp-tcp-listen-port') sys.argv.append('6633') sys.argv.append('simple_switch_13') sys.argv.append('--verbose') sys.argv.append('--enable-debugger') manager.main() if __name__ == '__main__': main() Where simple_switch_13 is your ryu.app.name. Run with Shift+F9 in Pycharm. If you choose any line in your Ryu app to debug, the console will show you the data about this variable like the following screenshot:

How to use Syntax Highlighter on Blogger

Image
You can see this video to know how to modifiy your blogger template to enable Syntax Highlighter. If you want add more brushes, you can add the code in this url to your blogger template: http://www.ikancomel.com/2016/08/cara-menambahkan-syntaxhighlighter-pada.html

Run wireshark as unprivileged user (without root)

Image
If you want to run wireshark without sudo, you will get this error and you couldn't capture traffic: To fix it, you must run these codes, and later reboot your machine: sudo groupadd wireshark sudo usermod -a -G wireshark $USER sudo chgrp wireshark /usr/bin/dumpcap sudo setcap cap_net_raw,cap_net_admin=eip /usr/bin/dumpcap sudo dpkg-reconfigure wireshark-common

How to import a graphml topology in mininet

If you want to load topologies in your network emulation with mininet, the best option is use grahpml format. I compared a lot extesions available from Gephi and Cytoscape (software for work with topologies) and graphml is one of the extensions that gives more information about the topology. You can export your topologies and save information like label, geolocalization, delay, bw, loss, etc. If you want real topologies, you can get them from Topology Zoo website . To import these topologies to mininet, you can use  Auto-Mininet (for mininet 2.0.0): git clone https://github.com/uniba-ktr/assessing-mininet.git cd assessing-mininet/parser wget  http://topology-zoo.org/files/Chinanet.graphml ./GraphML-Topo-to-Mininet-Network-Generator.py -f Chinanet.graphml -o chinaNet.py python chinaNet.py   File "test", line 44     Xi'an = self.addSwitch( 's18' )                             ^ Syn...

How to install Gephi 0.9.2 snapshot version

Image
To install the lastest version, proceed to download it from github: git clone https://github.com/gephi/gephi.git cd gephi mvn clean install command not found: mvn To install maven, install it from repositories: sudo apt-get install maven mvn clean install cd modules/application   mvn nbm:cluster-app nbm:run-platform This last command will call to the following sentence to run gephi. /bin/sh -c /home/dragonx/Downloads/gephi/modules/application/target/gephi/bin/gephi --userdir /home/dragonx/Downloads/gephi/modules/application/target/userdir -J-Dnetbeans.logger.console=true -J-ea --branding gephi --jdkhome /usr/lib/jvm/java-8-openjdk-amd64 You can use it to create a .desktop file in your desktop to run it. [Desktop Entry] Type=Application Icon=/home/dragonx/Pictures/icons/gephi.png Name=Gephi Comment="Start Gephi" Exec= /bin/sh -c /home/dragonx/gephi/modules/application/target/gephi/bin/gephi --userdir /home/dragonx/gephi/modules/application/target/user...

Change 8 spaces identation by default in vim by 4 spaces

To follow PEP-8 standar , for identation (tabs) it's recommended 4 spaces, not 8 as vim uses by default. To change this value, just add these lines to your vimrc file (usually located in /etc/vim/vimrc ). filetype plugin indent on " show existing tab with 4 spaces width set tabstop=4 " when indenting with '>', use 4 spaces width set shiftwidth=4 " On pressing tab, insert 4 spaces set expandtab if for some reason you need disable any command, just put an exclamation sign at the end of the command. For example: To enable number lines, use: set number To disable it, use: set number!

Mininet + Ryu + Faucet + Gauge + Influxdb

Image
First, to install faucet proceed to download it: pip install https://pypi.python.org/packages/a3/5a/197046b6fbad2f129e108358d7ba9674ebae638a227e6a1680cd77c7bd13/ryu-faucet-1.1.tar.gz or from the github: git clone https://github.com/onfsdn/faucet.git I had a problem to run gauge with this installer (maybe dependencies or something else). When I run gauge I got this error: raise SystemError('__init__ called too many times') SystemError: __init__ called too many times If you have the same issue reported as #19  or you want ot avoid it, they recommend to download the ryu-faucet VM to work on it: https://susestudio.com/a/ENQFFD/ryu-faucet/download/vmx The user is root and password is faucet I prefer work with byobu, to manage a lot tabs. To install on the VM just run: zypper install byobu If you try to run the ./test_config.py including in the faucet folder, you will see the following error: Traceback (most recent call last):   File "./test_config.py...

How to control a MagicBlue LED bulb with Linux

Image
If you want to control your LED bulbs throught bluetooth, I recommend MagicBlue LED bulbs. Does not have an official API, but exists an unofficial on  https://github.com/Betree/magicblue First, I installed an old version of magicblue (gattlib based), but I'm going to tell you the steps if you need to solve it for a similar app. sudo apt-get install python3-pip  sudo pip3 install setuptools bluepy git clone https://github.com/Betree/magicblue.git cd magicblue sudo python3.5 setup.py install  sudo magicblueshell ImportError: No module named 'gattlib' pip3 install gattlib /usr/bin/ld: cannot find -lboost_python-py34     collect2: error: ld returned 1 exit status     error: command 'x86_64-linux-gnu-g++' failed with exit status 1 pip3 download gattlib tar xvzf ./gattlib-0.20150805.tar.gz cd gattlib-0.20150805/ sed -ie 's/boost_python-py34/boost_python-py35/' setup.py pip3 install . sudo magicblueshell list_devices Name   ...

read command in zsh throws error

If you want emulate pause command in your shell, read is the most used command. In bash works without problems: read -p $'Press enter to continue...\n' ... but in zsh the argument -p is for coprocess, for that reason returns: read: -p: no coprocess To have a generic code to emulate pause command (independent of your shell), is better use the following sentence: printf 'Press enter to continue...\n';read ans Enjoy it!

How to accept pull request and update your master branch on github

If you have a project on github, probably you receive many pull request to update your project. To test the new branch, just write: git fetch origin pull/1/head:branch_name where 1 is the pull request number To push the new files, just write: git push origin branch_name If you want copy this branch to the master, just write: git push -f origin branch_name:master For more information, visit  https://help.github.com/articles/checking-out-pull-requests-locally/

Compile faster throught a RAM disk

Image
Compile programs takes a long time. Do you have an SSD and it takes more time than with your old HDD? A good solution is create a RAM disk and compile on them. First, you need to create a disk on your RAM (I chose 1Gb size) sudo mkdir /mnt/tmpfs sudo mount -o size=1G -t tmpfs none /mnt/tmpfs Now, for test the speed, procced to create a file on it with dd: dd if=/dev/zero of=file bs=1M count=100 On Ram disk (1.8 GB/s): On SSD disk (172 MB/s): It's a great difference! Enjoy it!

How to install Wireshark 2.3 on Ubuntu 16.04 with Iperf dissector compatibility

Image
To install this last version of wireshark, follow these steps: wget https://www.wireshark.org/download/automated/src/wireshark-2.3.0-947-g5a12a5e.tar.xz tar xvf wireshark-2.3.0-947-g5a12a5e.tar.xz cd wireshark-2.3.0-947-g5a12a5e ./autogen.sh ./autogen.sh: 1: ./autogen.sh: libtool: not found You must have libtool 2.2.2 or later installed to compile Wireshark. Download the appropriate package for your distribution/OS, or get the source tarball at ftp://ftp.gnu.org/pub/gnu/libtool/ Libtool usually already exists in the system, but with a different name. To solve it, just create a symbolic link with the name that autogen.sh expected: sudo ln -s /usr/bin/libtoolize /usr/bin/libtool Now, continue: ./autogen.sh ./configure  --with-lua checking for the location of lua.h... not found configure: error: Lua support was requested, but is not available You need to install liblua5.2-dev, because liblua5.3-dev is not recognized by wireshark by default. Wiresh...

Add Valgrind to CLion

Image
Valgrind is an open-source memory debugger and you can use throught CLion (C IDE). I found this site where they show step by step how to add valgrim as external application to CLion. But... some mistakes that you could eventually find: 1.- You must install clang and obiously valgring: sudo apt-get install clang valgrind 2.- Modify the path to valgrim in valgrim.sh. Replace /usr/local/bin/valgrim by /usr/bin/valgrim 3.- You can find external tools configuration on:  File/Settings.../Tools/External Tools 4.- If you want the real icon to put it on toolbar, follow these commands: wget  http://support.dotriver.eu/lib/exe/fetch.php?cache=&w=64&h=64&tok=54e00f&media=presentation_des_logiciels:logo_valgrind.png convert logo_valgrind.png -resize 16x16 logo.png Now you can choose it to your toolbar If you run your code and you got no errors but suppressed errors, don't be afraid: You can see sup...

How to create a C project with CLion

If you create a new project on CLion, it will be a C++ project. If you want a C project, for the moment (2 years ago that users are asking the same to JetBrains here ) you will need to edit CMakeLists.txt file: replace: set(CMAKE_CXX_FLAGS "${CMAKE_CXX_FLAGS} -std=c++11") set(SOURCE_FILES main.cpp) by: set(CMAKE_C_FLAGS "${CMAKE_C_FLAGS} -Wall -Werror") set(SOURCE_FILES main.c) Now, rename your main.cpp to main.c Enjoy it! Remember CLion (Jetbrains suite) it's free for students Free for students: Professional developer tools from JetBrains https://t.co/L8bxXBhwXA — NicolĆ”s Boettcher (@nicoboettcher) October 4, 2016 I enjoy student life @clion_ide pic.twitter.com/CxMNoW6cmg — NicolĆ”s Boettcher (@nicoboettcher) October 4, 2016

SNMP + Telegraf + InfluxDB

Image
First, install telegraf from github with the branch to fix-snmp-not-in-mib branch, that solves the issue #1833 git clone -b fix-snmp-not-in-mib --single-branch https://github.com/phemmer/telegraf.git After, I searched all MIB about an specific interface through bash language: IFACE="enp3s0" ID=`snmpwalk -v2c -c public localhost | grep "ifName.*STRING: $IFACE" | sed 's/\./ /g' | tail -n1 | awk '{print $2}'` snmpwalk -v2c -c public localhost | grep "^IF-MIB::if.*\.$ID" It outputs a lots MIBs, but most relevants are: IF-MIB::ifName.2 = STRING: enp3s0 IF-MIB::ifDescr.2 = STRING: Realtek Semiconductor Co., Ltd. RTL8111/8168/8411 PCI Express IF-MIB::ifType.2 = INTEGER: ethernetCsmacd(6) IF-MIB::ifMtu.2 = INTEGER: 1500 IF-MIB::ifSpeed.2 = Gauge32: 10000000 IF-MIB::ifHighSpeed.2 = Gauge32: 10 IF-MIB::ifPromiscuousMode.2 = INTEGER: false(2) IF-MIB::ifConnectorPresent.2 = INTEGER: true(1) IF-MIB::ifPhysAddress.2 = STRING: AB:57:...

Issues to display SNMP information

This is a typical error on snmpwalk at the beginning of the display information: snmpwalk -v1 -c public 127.0.0.1 system Expected "::=" (RFC5644): At line 493 in /usr/share/mibs/iana/IANA-IPPM-METRICS-REGISTRY-MIB Expected "{" (EOF): At line 651 in /usr/share/mibs/iana/IANA-IPPM-METRICS-REGISTRY-MIB Bad object identifier: At line 651 in /usr/share/mibs/iana/IANA-IPPM-METRICS-REGISTRY-MIB Bad parse of OBJECT-IDENTITY: At line 651 in /usr/share/mibs/iana/IANA-IPPM-METRICS-REGISTRY-MIB Bad operator (INTEGER): At line 73 in /usr/share/mibs/ietf/SNMPv2-PDU Unlinked OID in IPATM-IPMC-MIB: marsMIB ::= { mib-2 57 } Undefined identifier: mib-2 near line 18 of /usr/share/mibs/ietf/IPATM-IPMC-MIB Open /etc/snmp/snmp.conf and it should be as follows: mibs : mibs +SNMPv2-MIB But, if you run ... snmptranslate -m all -Tz -On | sed -e 's/"//g' > /tmp/oids.txt ... to create your oids.txt, you still see the same error. To fix them, you can edit th...

Grafana's save/remove button does not appear on version 2.6

Image
I'm using grafana 2.6 (from repositories), but I can't save or delete any dashboard. I try with chrome and firefox from linux but none work properly. To fix it, you need to install the last version (3.1.1) If you remove and purge grafana maybe you will get this error: sudo apt-get purge grafana Purging configuration files for grafana (2.6.0+dfsg-1) ... dpkg: warning: while removing grafana, directory '/var/log/grafana' not empty so not removed dpkg: warning: while removing grafana, directory '/var/lib/grafana' not empty so not removed To fix it, just remove them: sudo rm /var/log/grafana sudo rm /var/lib/grafana Now, proceed to install the last version: wget  https://grafanarel.s3.amazonaws.com/builds/grafana_3.1.1-1470047149_amd64.deb sudo dpkg -i grafana_3.1.1-1470047149_amd64.deb (Reading database ... 416705 files and directories currently installed.) Preparing to unpack grafana_3.1.1-1470047149_amd64.deb ... Unpacking grafana (...

Ping plugin for Telegraf to ping multiple ips and export it to InfluxDB

Image
First, proceed to generate your telegraf configuration file with ping plugin enabled: telegraf -sample-config -input-filter ping -output-filter influxdb > telegraf_ping.conf If you want to do the classic ping with 1 sec interval, edit the following options: [agent]   interval = "1s"   flush_interval = "1s" [[inputs.ping]]   urls = ["8.8.8.8","8.8.4.4"]  #Add your ips list   count = 1   ping_interval = 1.0   timeout = 0.0 Now, to run it, execute: telegraf -config telegraf_ping.conf Meanwhile, you can show it on Grafana: Enjoy it!

How to add CPU load value to your InfluxDB with bash scripting

Image
First, we going to create a database with an example value, like this example: Now, with a bash script we going to write to our database the first value from /proc/loadavg, every 5s: while true; do curl -i -XPOST 'http://localhost:8086/write?db=stat' --data-binary "cpu,host=SERVER001 value=`cat /proc/loadavg | awk '{print $1}'`"; sleep 5;done

Plot a sine function with Python + InfluxDB + Grafana

Image
I found an updated code for InfluxDB v0.10.0 and I fork the proyect. The code is here: https://gist.github.com/dragonxtek/f7fb410a744fbccd836b25be454e7ba7 Just create a test database in InfluxDB and run sine.py

How to configure SNMP in mininet

First, you need to install snmp on your system: sudo apt-get install snmp snmpd Now, procced to configure snmp with the respective information about your machine: sudo mv /etc/snmp/snmpd.conf  /etc/snmp/snmpd.conf.org sudo vim /etc/snmp/snmpd.conf #Add these lines #Change public by your SecretPassword if you like rocommunity  public syslocation  "Somewhere" syscontact  nicolas.boettcher@mail.udp.cl Now, edit the snmp daemon to listen all interfaces: sudo vim /etc/default/snmpd Change from: # snmpd options (use syslog, close stdin/out/err). SNMPDOPTS='-Lsd -Lf /dev/null -u snmp -I -smux -p /var/run/snmpd.pid 127.0.0.1' To: # snmpd options (use syslog, close stdin/out/err). #SNMPDOPTS='-Lsd -Lf /dev/null -u snmp -I -smux -p /var/run/snmpd.pid 127.0.0.1' SNMPDOPTS='-Lsd -Lf /dev/null -u snmp -I -smux -p /var/run/snmpd.pid -c /etc/snmp/snmpd.conf' Now, restart the daemon with:  /etc/init.d/snmpd restart To check it's all o...

TERM environment variable not set on Python

Image
To avoid this warning when you try clear your console through os.system('clear') on linux, you must configure TERM variable on your environment with "xterm-color" value. In Pycharm, you can add it on File/Settings.../Build, Execution, Deployment/ Console/Python Console Enjoy it!

How to execute Python scripts in Android

Image
First, you need to install QPython in your Android. To access to your Android console, you can use SSHDroid  (remote access) or Terminal Emulator  (local access). Python for Android depends from a lot bash scripts. You need use all of them to run it. Now, you need add to your PATH (configurable in init.environ.rc), python executable. Other option is create symbolic links of your apps to /system/bin, as follow: su mount -o rw,remount /system cd /system/bin ln -s /data/data/org.qpython.qpy/files/bin/end.sh  ln -s /data/data/org.qpython.qpy/files/bin/python-android5 ln -s /data/data/org.qpython.qpy/files/bin/init.sh ln -s /data/data/org.qpython.qpy/files/bin/qpython-android5.sh python Now you can run python on your console :) To execute a python script without calls to python, you must write on the first line of your script this line: #!/system/bin/python To execute the script, give it execution permission throught the console: chmod +x $NAME.py ...